You can choose to define a Simple Audience based on two rules or criteria (domain and template). A rule for a Simple Audience must include a domain or at least one person in the Included People list. You have the option to include an existing audience template with the domain. Users who match the domain values selected and/or belong to the existing audience templates will be included in the audience membership.
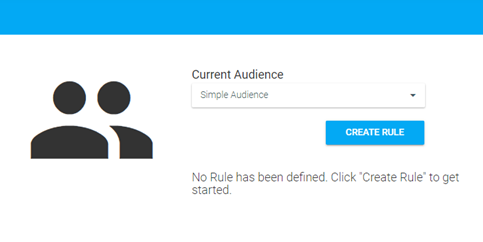
To define a Simple Audience rule, select Simple Audience in the Rule Type selection screen and click Create Rule.
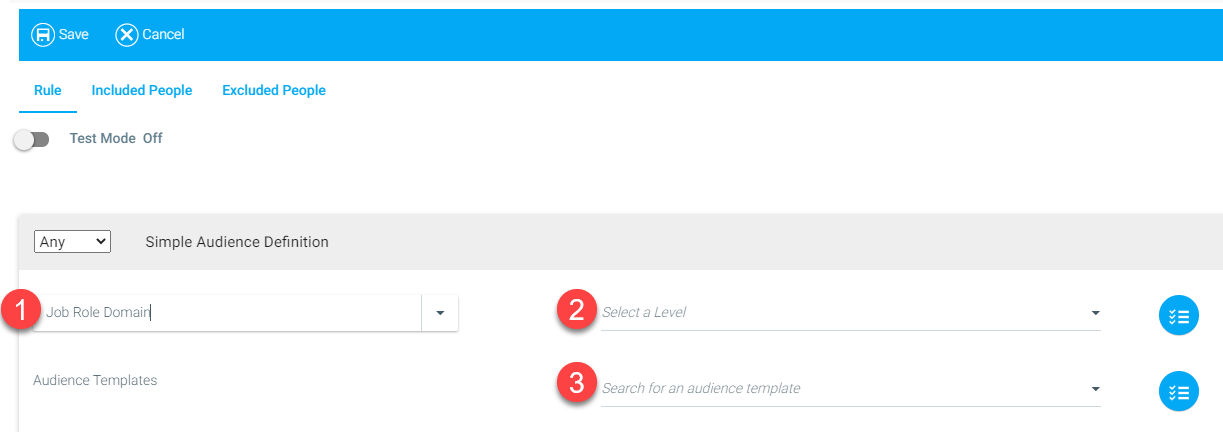
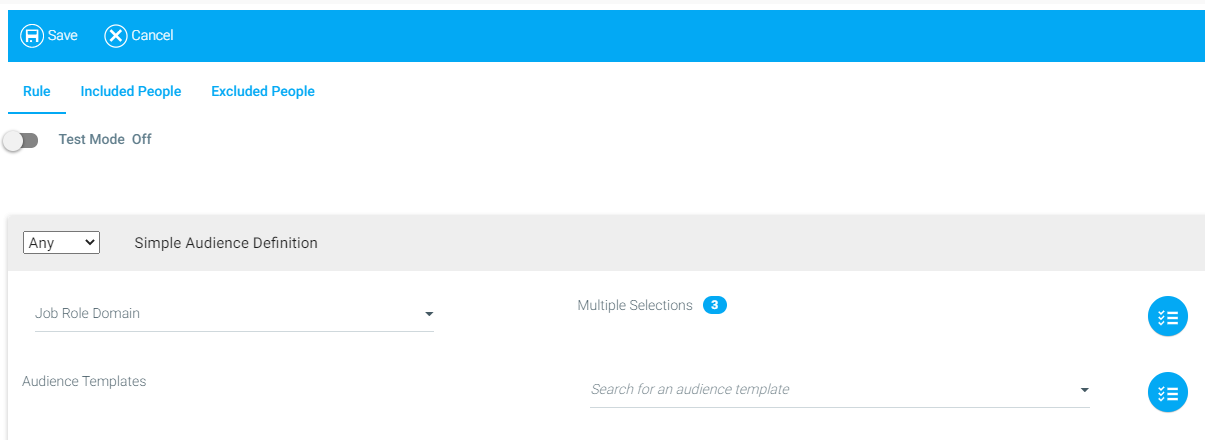
The Simple Criteria Definition screen will pop up. Select a Domain from the drop-down menu (1). Then, type the Domain Value (level) or select from the drop-down menu (2). You also have the option to include an existing audience template. To do so, type the name of the audience template or select it from the drop-down menu (3).
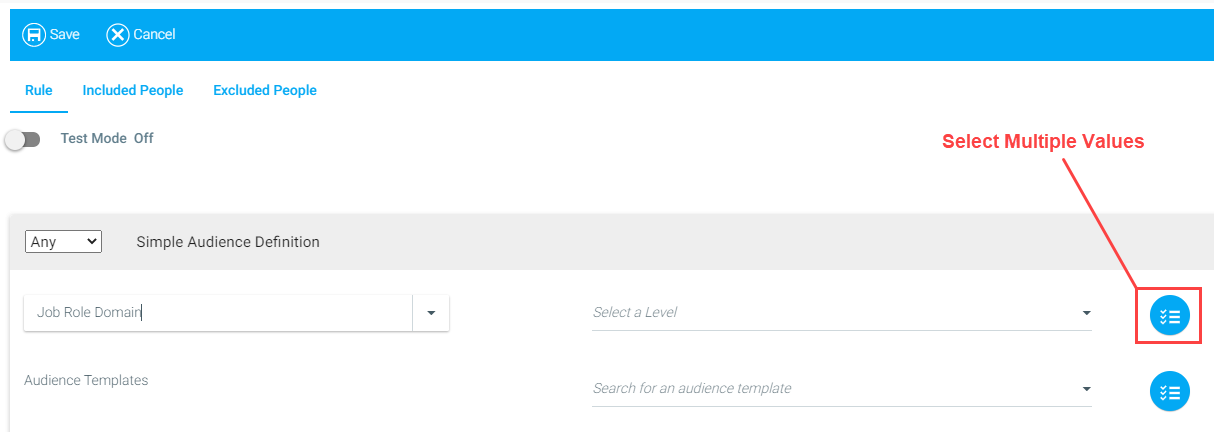
From the Simple Criteria Definition screen, select the checklist icon to the right of the Domain field or the Audience Template field. This will open the selection window.
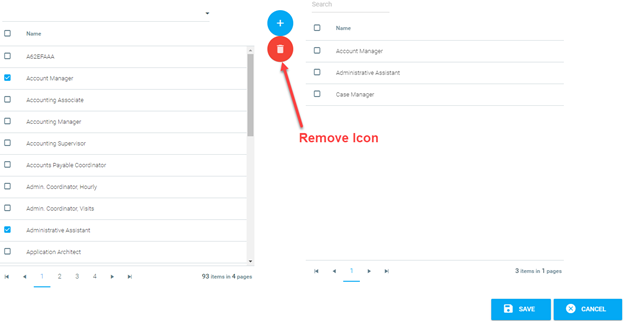
Select the values from the list displayed on the left side of the window. To narrow this list or to search for specific values, type in the search field above the list. To select one or more values, click the check-boxes next to each value you want to include, then click the Add icon.
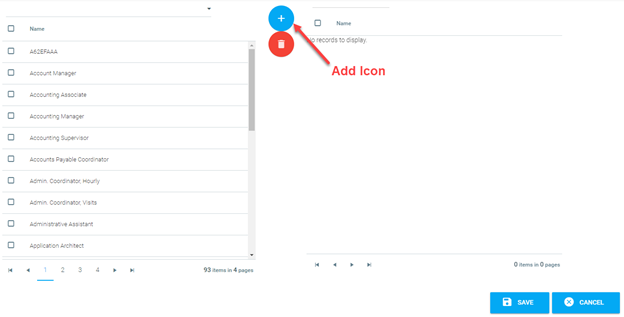
The selected values will appear int he column on the right. Enter a keyword in the search field above the right column to locate a specific value already selected. To deselect a value, click the checkbox next to the value, then click the Remove icon. Click Save.
The Rule Definition screen will now show the number of values selected for the rule.
If multiple values are selected for a field, the rule is processed by using the OR condition between values. For more information on conditions, see the Any/All Condition section of Creating an Advanced Audience Rule.
If this feature is not present in your instance of LearnShare, please contact Client Support to have it enabled.
Checking the Prevent auto joining check box allows administrators to set a date after which no users will automatically join an audience. This feature is enabled for learning resources and mapping curricula, but not for audience templates.
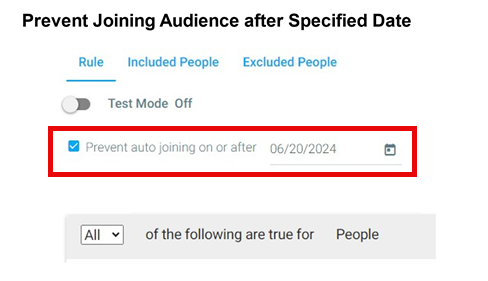
When this box is checked, users will no longer automatically "join" the audience starting at midnight EST on the date entered in the date field.
This feature allows people to leave an audience automatically.
You can still manually add people to the Included People and Excluded People lists.
This feature will not always block people from the Included People list. For example, if someone is on the Included People list and becomes inactive before the selected date, then they are reactivated again after the date, the person will be back in the audience and their deadline may be pushed out relative to the time they became active again in the audience.
This feature could be useful for training that only occurs during a specific time of year and is not essential for new employees before they begin work. For example, if the training is offered in January each year, with a due date of January 31st, then someone joining the company in February would not automatically join the audience and immediately be overdue. Instead, that person would be included in the audience for the same training in the following January.
Once the date arrives, you are no longer able to:
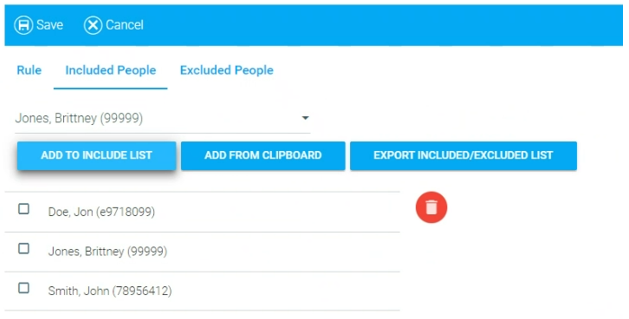
Click Included People to add specific individual users to an audience, even if they do not match the selected rule criteria. Type or select a user's name from the drop-down menu and click Add to Include List. In addition to the users in the selected domains or templates, these users will be included in the audience. To remove a user from the list, click on the checkbox beside the user's name and click the Remove icon (trash can). To send the list of people to an Excel spreadsheet, click the Export Included/Excluded List button.
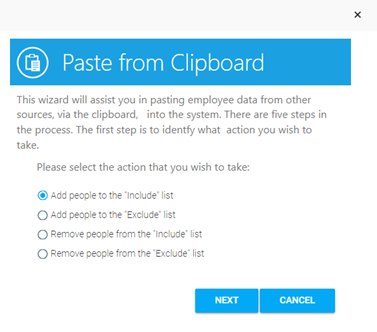
You can also use the clipboard to add employee data from another source. After clicking the Add from Clipboard button, the pop-out box below will appear. Make your selection and then click Next.
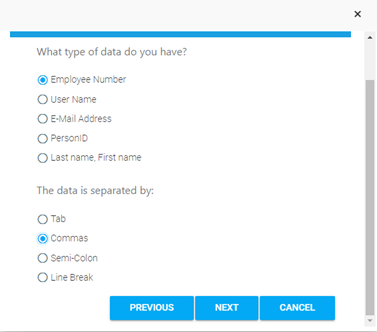
You will be prompted to select the type of data you have and how you wish to separate each piece of data. Make your selections and click Next.

The next screen will have a text box for you to paste in all of the data. You can choose to include inactive data by clicking the Include Inactive Data checkbox. After you have entered all of your data, click Next.

The following screen will appear. The green check marks indicate that each employee ID number successfully matched a user int he LMS. Alternatively, if no match is found, a red X will be displayed next to the data entered. If you have a long list of employee data, it can be helpful to check the Show Only Mismatched Data box. This will display only the items that did not have a match.
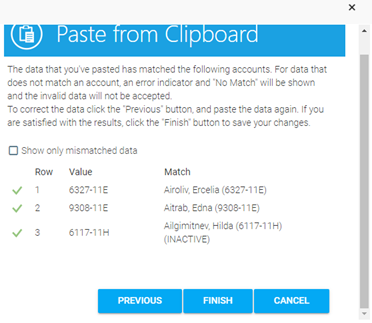
Click the Finish button when you are satisfied with all of the data selections in the Paste from Clipboard wizard. This will add all of the users to the Included People audience.
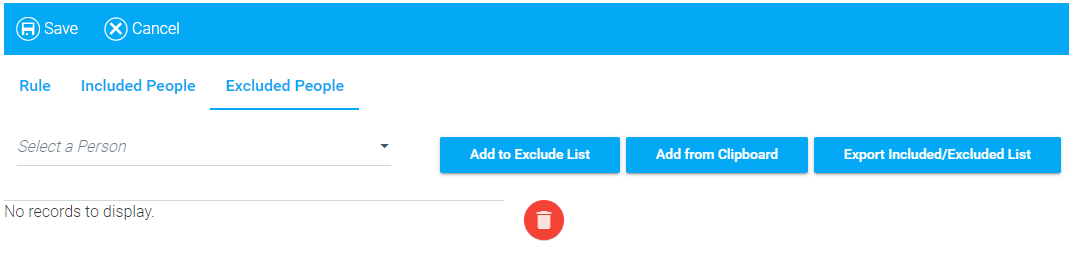
Click Excluded People to remove specific individual users from an audience, even if they match the selected rule criteria. Type or select a user's name from the drop-down menu and click Add to Exclude List. These users will not be included in the audience, even if they are part of the selected domain(s) or audience template(s). To remove a user from the list, click on the checkbox beside the user's name and click the Remove icon (trash can). To send the list of people to an Excel spreadsheet, click the Export Included/Excluded List button.
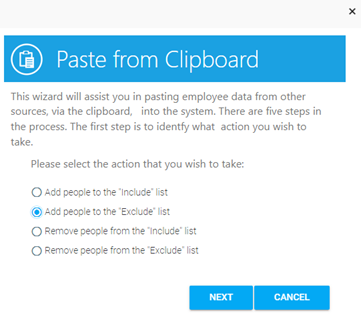
You can also use the clipboard to add employee data from another source. AFter clicking the Add from Clipboard button, the pop-out box below will appear. Make your selection and click Next.
You will be prompted to select the type of data you have an dhow you wish to separate each piece of data. Make your selections and click Next.
The next screen will have a text box for you to paste in all of the data. You can choose to include inactive data by clicking the Include Inactive Data checkbox. After you have entered all of your data, click Next.

The following screen will appear. The green check marks indicate that each employee ID number successfully matched a user in the LMS. Alternatively, if no match is found, a red X will be displayed next to the data entered. IF you have a long list of employee data, it can be helpful to check the Show Only Mismatched Data box. This will display only the items that did not have a match.
Click the Finish button when you are satisfied with all of the data selections in the Paste from Clipboard wizard. This will add all of the users to the Excluded People audience.